¶ Maze lesson 1: Preparation
Welcome to the first lesson of maze! In case you had any problems with setting up Python, PyCharm or the Pommerman environment please inform the education committee so we can adjust the guides.
In case you have any remarks or questions about these tutorials they are always welcome, preferably via the slack channel wiki-content-feedback. (You can notify the education committee specifically by adding @educo to your message.) You may also send us an email at education@serpentineai.nl.
¶ Intro
In this first lesson we are going to talk about setting up things for working with the procgen Maze environment.
- How to use the procgen environment.
- Introducing our basic Agent model.
- How to run and visualize Maze with a random agent.
¶ Game information
Maze is a procgen environment where the goal of the player, a mouse, is to reach the cheese that is hidden in a maze. Procgen environments normally have 15 different actions, but for this specific environment the number of meaningful actions you can take is limited to five. These entail doing nothing, moving up, down, right and left.
In any given turn, an agent can choose from one of the following 5 actions
| Action | info | int |
|---|---|---|
| Stop | This action is a pass. | 0 |
| Left | Move left on the maze. | 1 |
| Up | Move up on the maze. | 3 |
| Down | Move down on the maze. | 5 |
| Right | Move right on the maze. | 7 |
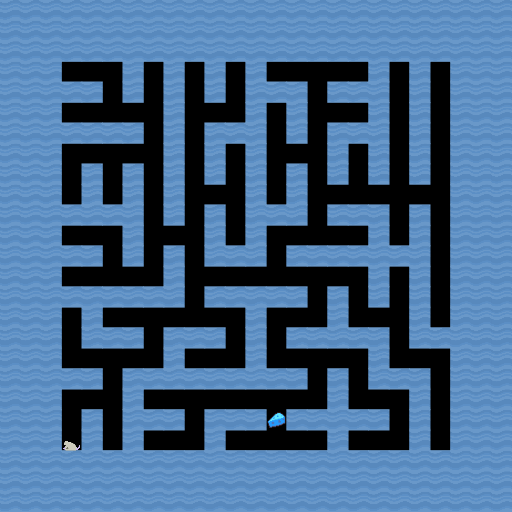
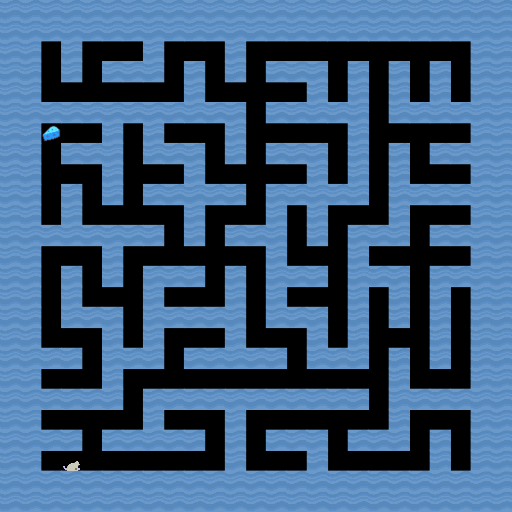
The original observation is a color image, a so called RGB image of 64 by 64. This can be enough for a machine learning algorithm, but it is really confusing for humans. Therefore, there is a second option to display the game, using an RGB image of 512 by 512 (see the figure below).
Because procgen is using procedural level generation every maze is generated randomly and therefore the size of the maze is also variable. A full size maze contains 25 blocks in the width and height, while a smaller maze will use less of the outer blocks, up to a minium of 5 by 5.
If you want to try out the game yourself using the arrow keys (↑,↓, ←, →), run the following line in your command prompt:
python -m procgen.interactive --env-name maze
¶ Game loop (procgen)
The procgen game loop is very similar to the gym game loop. In case you have done the Pommerman tutorial or the gym tutorial from the machine learning track, the game loop will be very familiar to you. However there are also some new changes in the procgen loop, for example:
- procgen has slightly different syntax and initialization.
- procgen games automatically reset after calling
env.reset()once. - procgen does not render the game when calling
env.render().
Another addition to the game loop is the interaction with the agent, which is required to get the action. In total there will be 5 stages and tabs.
- Explain the basic procgen environment loop (without an agent)
- Explain the basic procgen environment + how to show a human size observation.
- Introduce an Agent skeleton code, that will be improved throughout the tutorials.
- Create a custom environment loop, where you introduce the random agent.
- Refactor the code to create a function that handles rendering an image, and one to handle the game loop.
This is a basic procgen loop. For the tutorial you can make a file called example_loop.py, if you want to test out the basic procgen loop yourself.
Unlike gym, procgen can contain multiple environments at the same time, and therefore automatically resets an environment if that single game is done. So there is no need to call reset when the game is done. If you want to limit on the number of episodes, you have to manually check the returned done vector, or alternatively run the game for a number of steps instead (as is done below).
import numpy as np
import procgen

if __name__ == '__main__':
    # Generate procgen environment, which is a vectorized environment.
    # Therefore the name is shortened to venv, instead of env like in gym.
    venv = procgen.ProcgenEnv(num_envs=1, env_name='maze')

    # A single reset call to run the game.
    venv.reset()

    # We will run 250 steps in the `Maze` environment,
    # this doesn't have to mean that we finished an episode.
    for step in range(250):

        # Since there can be more than 1 environment,
        # the input has to be a numpy array instead of a single integer.
        actions = np.array([0])
        obs, reward, done, info = venv.step(actions)

        # Provide information about how many steps have been performed.
        print(f"\rRunning game frame {step + 1:4,d}", end='')

    # It is a good practice to properly close an environments,
    # when you are done with them.
    venv.close()
Example of how to run procgen environments (specifically maze) and render the human size observation. In order to get the image, we have to explicitly tell procgen render_mode='rgb_array' on creation of the environment. The image is then obtained by calling venv.render(mode='rgb_array') and rendered using opencv.
If you get an error about
cv2.imshow, try uninstalling and reinstalling opencv, in any case run:pipenv uninstall opencv-pythonandpipenv install opencv-python.
import cv2
import numpy as np
import procgen

if __name__ == '__main__':
    # Generate procgen environment, which is a vectorized environment
    # Therefore the name is shortened to venv, instead of env like in gym.
    # The `render_mode='rgb_array'` is required for rendering the human observation.
    venv = procgen.ProcgenEnv(num_envs=1, env_name='maze', render_mode='rgb_array')

    # A single reset call to run the game.
    venv.reset()

    # We will run 250 steps in the `Maze` environment,
    # this doesn't have to mean that we finished an episode.
    for step in range(250):
        # Since there can be more than 1 environment,
        # the input has to be a numpy array instead of a single integer.
        actions = np.array([0])
        obs, reward, done, info = venv.step(actions)

        # In order to render the human size observation, we have to get the observation ourself.
        img = venv.render(mode='rgb_array')

        # use opencv to render the observation and sleep for a while.
        cv2.imshow('Rendering game', img)
        cv2.waitKey(int(1000 / 60))

        # Provide information about how many steps have been performed.
        print(f"\rRunning game frame {step + 1:4,d}", end='')

    # It is a good practice to properly close windows and environments,
    # when you are done with them.
    cv2.destroyWindow('Rendering game')
    venv.close()
This is the minimum skeleton code for the agent that will be used throughout this tutorial. In later lessons the compute_action method will be updated to return the best possible action instead of a random action.
import numpy as np
from procgen import ProcgenEnv


class Agent:
    def __init__(self, venv: ProcgenEnv):
        self.action_space = venv.action_space.n

    def compute_action(self, observation: np.ndarray) -> np.ndarray:
        """ Calculate the best action for the agent.  """
        return np.random.randint(0, self.action_space, 1)
This is a combination of step 2 and 3. Instead of picking the NOOP action (np.array([0])), we let the agent compute an action based on the current environment observation.
import cv2
import numpy as np
import procgen


class Agent:
    def __init__(self, venv: procgen.ProcgenEnv):
        self.action_space = venv.action_space.n

    def compute_action(self, observation: np.ndarray) -> np.ndarray:
        """ Calculate the best action for the agent.  """
        return np.random.randint(0, self.action_space, 1)


if __name__ == '__main__':
    # Generate procgen environment, which is a vectorized environment
    # Therefore the name is shortened to venv, instead of env like in gym.
    # The `render_mode='rgb_array'` is required for rendering the human observation.
    venv = procgen.ProcgenEnv(num_envs=1, env_name='maze', render_mode='rgb_array')
    agent = Agent(venv)

    # A single reset call to run the game.
    venv.reset()

    # We will run 250 steps in the `Maze` environment,
    # this doesn't have to mean that we finished an episode.
    for step in range(250):
        # Let the agent compute an action on the human image.
        observation = venv.render('rgb_array')
        actions = agent.compute_action(observation)
        obs, reward, done, info = venv.step(actions)

        # In order to render the human size observation, we have to get the observation ourself.
        img = venv.render(mode='rgb_array')

        # use opencv to render the observation and sleep for a while.
        cv2.imshow('Rendering game', img)
        cv2.waitKey(int(1000 / 60))

        # Provide information about how many steps have been performed.
        print(f"\rRunning game frame {step + 1:4,d}", end='')

    # It is a good practice to properly close windows and environments,
    # when you are done with them.
    cv2.destroyWindow('Rendering game')
    venv.close()
This is a cleaned up version of the code in tab 4. It has all comments removed and runs an agent for a specified number of steps. The show function is an update to the previous one, because it now stops showing the window from rendering whenever you press q on the keyboard or close the observation window. You can directly copy this code and place it in main.py.
The agent has been replaced to a different file, because it will get a lot more code added to it later on in this tutorial. For import reasons it is best to store the agent in a file called agent.py in a folder called core. That is the used folder structure for this tutorial, but you can change this at your own discretion, only keep in mind to update the relevant imports.
def show(image, render, delay=1, window_name='Render game'):
    """ Display an image to the screen, and make it possible to destroy the window.  """
    if render:
        cv2.imshow(window_name, image)

        # When you press q, or destroy the window using the `X` button.
        # The game will run in the background instead.
        if cv2.waitKey(delay) & 0xFF == ord('q'): return False
        if cv2.getWindowProperty(window_name, 0) == -1: return False
    else:
        cv2.destroyWindow(window_name)
    return render
def run_environment(venv: procgen.ProcgenEnv, agent: Agent, steps: int = 500, render: bool = False, delay: int = 1):
    """ Run the environment for a fixed amount of steps.  """
    venv.reset()
    score = 0

    for step in range(1, steps + 1):
        image = venv.render('rgb_array')
        action = agent.compute_action(image)
        obs, reward, done, info = venv.step(action)
        score += sum(reward)
        render = show(image, render, delay)

        print(f'\rSteps: {step:4,d} / {steps:,d}, total score: {score:3.0f}, mean score: {score / step:5.3f}', end='')
¶ Main
This is the main.py code that should run everything at the end of the tutorial. Note how it imports Agent using from core.agent import Agent, this is because of the chosen folder structure.
import procgen

from core.agent import Agent

...

if __name__ == '__main__':
    venv = procgen.ProcgenEnv(num_envs=1, env_name='maze', render_mode='rgb_array')
    agent = Agent(venv)

    run_environment(venv, agent, render=True)
¶ Full code
In order to summarize all the code, the following folder structure is assumed
Project folder
├─── core
│    └─── agent.py
└─── main.py
import numpy as np
from procgen import ProcgenEnv


class Agent:
    def __init__(self, venv: ProcgenEnv):
        self.action_space = venv.action_space.n

    def compute_action(self, observation: np.ndarray) -> np.ndarray:
        """ Calculate the best action for the agent.  """
        return np.random.randint(0, self.action_space, 1)
import cv2
import procgen

from core.agent import Agent


def show(image, render, delay=1, window_name='Render game'):
    """ Display an image to the screen, and make it possible to destroy the window.  """
    if render:
        cv2.imshow(window_name, image)

        # When you press q, or destroy the window using the `X` button.
        # The game will run in the background instead.
        if cv2.waitKey(delay) & 0xFF == ord('q'): return False
        if cv2.getWindowProperty(window_name, 0) == -1: return False
    else:
        cv2.destroyWindow(window_name)
    return render


def run_environment(venv: procgen.ProcgenEnv, agent: Agent, steps: int = 500, render: bool = False, delay: int = 1):
    """ Run the environment for a fixed amount of steps.  """
    venv.reset()
    score = 0

    for step in range(1, steps + 1):
        image = venv.render('rgb_array')
        action = agent.compute_action(image)
        obs, reward, done, info = venv.step(action)
        score += sum(reward)
        render = show(image, render, delay)

        print(f'\rSteps: {step:4,d} / {steps:,d}, total score: {score:3.0f}, mean score: {score / step:5.3f}', end='')
    venv.close()


if __name__ == '__main__':
    venv = procgen.ProcgenEnv(num_envs=1, env_name='maze', render_mode='rgb_array')
    agent = Agent(venv)

    run_environment(venv, agent, render=True)
¶ Summary
In this lesson we have first taken a look at the Maze environment from procgen. Then we have created a custom agent to interact with the procgen environment and a custom procgen loop that interacts with the game and a random agent. Then, we have seen how we can render a human observation from the game using opencv and lastly we have cleaned the code to be ready to use.
In the following tutorials we will take a look at how we can extract
- the maze from the image.
- the mouse and cheese (player and goal).
- a path from mouse to cheese.
In the next tutorial we will take a look at how we can extract the maze from the human observation. Since this is required to create a path from the mouse to the cheese.